Search This Blog

Wednesday, October 2, 2013

How I fixed my under processed hair! Accidentally Texlaxed!

HEY TO ALL MY BLOGGERS! SORRY IVE BEEN AWAY SO LONG! I AM BACK WITH SOME GREAT NEWS! 

I have finally fixed my under processed hair! It took some serious research and work but I did it and I couldnt be happier! I had been struggling with my under processed hair for a very long time. I was what I called "accidentally texlaxed". Texlaxed is when relaxed hair still has "texture" or a wave pattern to it when its wet. I did not want my hair to be like this so it was an accident; I was doing it to my hair without knowing. This is what i was doing that made my hair texlaxed:

  • NOT using enough relaxer
  • NOT using a strong enough relaxer
  • NOT smoothing down my new growth while the relaxer was on
  • NOT leaving the relaxer on long enough to "take"
Texlaxed hair shows when wet then air dryed
My hair was straight in some areas, and wavy in others (air dried)


I had to take charge of my hair so I started doing a lot of research and came to the conclusion that I needed a "corrective relaxer" A corrective relaxer is just a term that means you will relax over previously relaxed hair, from your roots to the ends because you need your hair to be one, smooth texture from root to end. You Must be VERY careful when doing this. You must wait at least 4 weeks after your previous relaxer before you attempt this. GO TO A HAIRSTYLIST if you can. Let them know your situation and what you desire. They would know the best method, products to use, and how long to keep the relaxer on your hair. If you are attempting this at home, don't be afraid, YOUR HAIR WILL NOT FALL OUT IF YOU DO IT RIGHT! I read up that it is best to use a lye relaxer for a corrective, instead of a no-lye. Here is a list of products I used:

  1. Dr. Miracles Lye "No Base" Relaxer in Super
  2. ISOPLUS neutralizer shampoo 
  3. ORS Olive Oil Replenishing Conditioner
  4. Mizani Thermasmooth Shampoo
  5. Optimum care Heat Protector polisher
  6. Dark & Lovely Natural Black semi-permanant dye (optional)
  7. Relaxer brush
  8. 2 shower caps
  9. Hair ties
  10. Wide tooth comb
  11. Flat iron
  12. Patience (lol)


This is all the steps I took for my corrective relaxer:
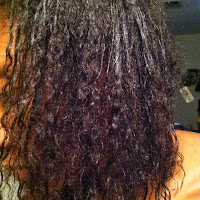
hair dampened then air dried
1)Damp hair-I damped my hair with water so it would curl up so I could see where I needed the most work. It was my roots and my ends.

2)Prep-I got my Dr. Miracles "No Base" relaxer in Super strength and prepped my hair for my relaxer (used Vaseline around my edges, ears, so on...)

3)Apply-I covered my shoulders with a towel, sectioned my hair in 4 sections (2 in the front and 2 in the back) and began brushing on heavy amounts of the relaxer with my relaxer brush on the areas that needed it the most FIRST.

4)Let process- I let that sit for about 3 minutes, then applied the relaxer on my entire head BUT NOT directly on my roots and scalp.

Hair covered in relaxer
5)SMOOTH!- I scooped up and smoothed the relaxer from a couple of inches away from my scalp, on to the very ends. I constantly smoothed for about 10 minutes. You must smooth to stretch your hair and get all the wave out!! I ran a small tooth comb down my hair, detangling from the ends first, up to the root. I also pressed down my roots with the opposite side of the comb to smooth my new growth when I got to that section last.

6)Neutralize-After smoothing, I rinsed and washed my hair 3 times with neutralizing shampoo (sold separately from the No Base Lye Dr. Miracles relaxer)

7)Deep Condition-After all the relaxer was out, I did a deep condition over night. I applied my ORS conditioner, put a shower cap over my head, put a silk scarf over that, and let it sit.

Deep condition
8)Wash...again-This step is optional but after rinsing out the conditioner the next morning, I washed my hair with the Thermasmooth Shampoo from Mizani. This shampoo has a special smoothing complex that I think would help my hair.

9)Color (optional)-I wanted to color my hair dark black so at this point, my hair was damp from the wash, so I applied my Dark & Lovely semi-permanent natural black hair color all over my head. I put on a plastic cap, sat under an over head dryer (optional if you don't have one), then rinsed.

10)Smoothing Serum (optional)-I applied Mizani thermasmooth serum on my damp hair (from the coloring).
After blow dry

Detangle often!


11)Blow dry-I completely blow dried my hair and wow did I see results already!!!


12)Heat protector (optional but recommended)-I applied a heat protector/flat iron serum to directly to the sections before flat ironing. I used a brush and a small tooth comb to help press out my hair.

13)Style as desired-I as so happy with my results!!!!!


Yay me!!!

Im SO glad I did this because now I have the smooth, frizz free hair that I wanted. Although it will never be PERFECT hair, its much better than that poodle hair I had! I hope you have a safe, successful hair journey!!

Monday, July 15, 2013

Hair growth challenge update!! I see growth!


Hey bloggers! I know it has been a while since I have posted here! Im so sorry! Life and school has "gotten in the way" of spending more time on my blog but I should be able to most more often now! I wanted to update you guys on my hair growth journey that I started just 3 1/2 months ago. Take a look at some of my before and after photos.

First day of challenge in April/beginning of May. Hair not quite BSL (bra strap length)


Bad picture :( Hair uneven. Left side shorter than right.

My hair was pretty uneven (because of a chop I did last year, attempting a bob cut....never again!) I can see that by using my MN (monistat) mix and taking biotin pills (from walmart), there is a noticeable amount of growth here! My hair is much softer and easier to manage. I am currently still wearing protective styles, such as wigs (but no sew-ins).

A noticeable amount of growth! Hair starting to even out!

I have had a few set backs because I got sick and stopped taking my biotin and stopped using my MN mix. I will get the ball rolling again because i love the results I have gotten from just 3-4 months of use!


Tuesday, June 11, 2013

Know your hair porosity! Remedy for dry, damaged hair


Have you had enought with your hair dry and brittle hair? Does it puff up so easily once you step outside, after your working so long and hard on flat ironing and/or styling your hair? Does humidity totally ruin your hair and make you not want to wear your own hair out? Or what about relaxers not taking for you relaxed girls? Does your hair not get straight after relaxing your new growth, even though you leave it on long enough? I KNOW HOW YOU FEEL! My previous post about my HAIR MELT DOWN promted me to do so serious research so I can find out what the heck is wrong with my hair. My research brought me to www.hairfinder.com where I learned about the porosity of hair. Some hair is more porous than others. There is normal hair, low porous hair, and high porous hair. This can happen with relaxed or natural hair! In order to tell you your hair is normal, low or high in porosity, do the strand and water test found here. Snap off a small strand of hair off of your hair (I got a peice at the end of my hair because thats where its very poofy). Drop the strand of hair into a container of water (the container should be clear so you can clearly see the strand of hair). Wait 2-5 minutes to see if your hair FLOATS or SINKS. If you hair sinks, it is pouros. The strand fills up with water causing it to sink. If the strand floats, it is normal/low porous hair. My hair is VERY POUROUS! It only took a couple seconds to sink!! Read more info below to find out how to care for and maintain high and low porous hair! If you hair is prone to get frizzy, dry and break off, it might be exeremly porous. If it refuses to take relaxers or hair color, it may have a very low porosity!
 
I found out about this shampoo that helps control the porosity of hair. It helps only high porous hair. Check it out on ebay here!

Porosity control shampoo by Roux


-----------------------------------------------------------------------------

Find original post here:

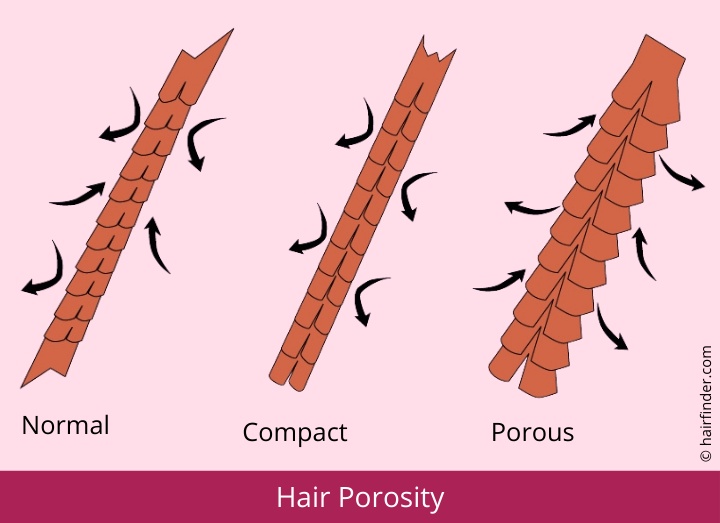
Hair Porosity

       Porosity is the measure of the hair's ability to absorb moisture. This is determined by the condition of the hair's cuticle layer (the overlapping scales of the hair shaft), and is rated as low, normal, and high. In normal, healthy hair, the cuticle is compact and inhibits the penetration of the hair shaft by moisture - both moisture going in, and moisture coming out. When the cuticle is overly compact and prevents the penetration of the hair by moisture it has low porosity.


hair porosity diagram
Hair porosity comparison
(Click to enlarge)


       Hair with low porosity is harder to process, and is resistant to haircolor and perms. Low porosity hair must usually be softened prior to other chemical services. Hair with high porosity is hair whose cuticle layer is open and the hair too-readily absorbs moisture. Overly-porous hair also releases moisture easily and becomes dry and is easily damaged. Acid-balanced conditioning treatments are used to contract the cuticle layer and lock-in moisture on overly-porous hair.
       Extreme caution must be used when performing chemical services on overly porous hair to prevent damage. Haircolor will take much more quickly and strongly in overly porous hair (and semi-permanent and demi-permanent haircolors will fade much more quickly). Perms and straighteners will process much faster in high-porosity hair as well.

       To determine the porosity of your hair, simply feel it - both when wet and when dry. If the hair feels straw-like and rough when dry, or if it feels gummy or slightly rubbery when wet, then you probably have a problem with overly porous hair. Or you can carry out a hair porosity test.

Monday, June 10, 2013

My First hair set back!! :(

THIS IS OFFICIALLY MY FIRST SET BACK OF MY HAIR JOURNEY. I relaxed my hair with a Lusters Pink brand touch up relaxer. 


This is the brand I always use; regular strength. I thought because I had been using monistat on my scalp that I needed to be extra gentle. BAD DECISION. I didn't put enough relaxer so I UNDER processes my new growth. OMG I HAVE NEVER EVER SEEN MY HAIR REACT LIKE THIS. My roots are nappy as all get out! My fingers get stuck at the root when trying to finger comb!! Ahhhhh!!!! I want to scream and cry!! I let it air dry thinking it would be better, heat damage wise....bad decision#2!!! OMG my hair is so brittle. I also used another/different shampoo that's suppose to be moisturizing with coconut but it totally dried my hair out. It had sulfates and my hair isn't used to them because I use Creme of nature sulfate free line faithfully! 


The shampoo that MAY or MAY NOT be to blame for my dry hair

I am soo depressed. I will try to shampoo again and get a hot oil treatment. I think one mistake I did was put the egg and Mayo protein treatment in my hair right after my relaxer :( I think that is what has made my hair dry and maybe not so much the shampoo :( I am doing my research about the porosity of hair and will inform you guys about it later :)


Oh! I also purchased this:

I think this product is water based; not good on relaxed, flat ironed hair. Better on wet hair before blow dry

^^^ I wanted to see what the big fuss was about about this she's butter conditioner. I can't give a totally honest review because my hair has hit a set back stage. I applied this on my dry hair And it seemed to do NOTHING but make my hair more dry when the product dried on my hair. This product is water-based so I try not to use it on dry, flat ironed hair. When I do, it just makes my hair "wet" again :(

Thursday, June 6, 2013

MY personal Hair Regimen! Steps to healthier hair!

Hey bloggers! I wanted to share with you the products that I have been using to create my hair regimen while on my long, healthy hair journey! These are the steps I have began to take in order to help me reach my goal to mid-back lenght hair by next year:

1) Relaxing further apart/stretching my relaxer-I discovered I was putting too much relaxer on my hair and I was over processing it. I was also relaxing too often. I will try to streach my relaxers for at least 4 months.

2)Using Miconozole Nitrate (Monistat)-Miconozole nitrate helps rid the scalp of bacteria. This promotes growth.

3)Taking Biotin pills-These pills can be found at Walmart, CVS or Walgreens, or probably anywhere vitamins are sold. It helps promote growth and good health of hair and nails.

4)Washing my hair more often-....but not TOO often. Instead of washing once a month, I wash twice to help get rid of build up on my scalp, thus promoting growth.

4)Protein treatments-I started using an egg and mayonnaise mix (YES eggs and mayo!) on my hair after washing it. I only do this maybe twice a month.

5)Rinsing conditioner out with cold water-I have heard that cold water closes the pores on your scalp, which I guess helps something lol

6)Rinsing my hair with vinegar-Vinegar (white or apple cider) helps your hair become shiny and soft. Mix half vinegar and half water, pour it on your hair and let sit under shower cap for 3 minutes. DO NO shampoo out.

7)Trim more often-Although I hate trimming length off, it has to go. That is the reason why my hair has been the same lenght for so long. I have major dead, split ends. It splits all the way up the hair shaft and causes breakage...so just cut it off!

8) Hand off-Yes, keeping your hands out of your hair is key. Too much styling such as constant brushing, combing and heat can severly damage hair causing it to break off.

9)Wearing protective styles-My main protective style are wigs. Although sew ins are good too, they can be damaging to your hair when removing them. I would suggest staying away from glued-in or bonded weaves. Even if glue is property taken out, it still may damage your hair.

10) Be patient!-You wont see major hair growth over night. It WILL be frustrating in the beginning. You must accept any set backs and move on. Take pictures of progress so you can see the change slowly being made. This will encourage you not to give up!

Hope this helps!!!

Thursday, May 30, 2013

How To Grow Waist Length Relaxed Hair-Black hair 101

Some tips and tricks to get your relaxed hair growing!


***Original Post by  of Black Hair 101: http://blackhair101.com ***


This was a phrase that I would search for in my early days of researching about hair because I so wanted to grow my hair to lengths that I never had. I picked up some very important tips and tricks along the way that I want to share with you. When beginning your long hair journey, remember these step-by-step instructions. Please note that everybody’s hair differs. Some of these steps may seem strange at first, but they will be beneficial in the long run.


Cut your hairCut my hair? Yes, cut it. Whether your hair is natural or relaxed if you have split raggedy ends, you need to give your hair a nice trim before you start out. If it is uneven and ragged or some strands are longer than others just cut it. Split ends can never be repaired, they just keep on splitting up to the hair root. Just cut them off. Hair grows an average six inches per year, you will get back some of it this year if you treat your hair right.


Extend your relaxing session. If you used to relax your hair every ten weeks, extend it to twelve. You will have to learn how to embrace your two textures by using moisture and inventive hair styles. The important thing to note is that the longer your natural hair growth is the better it is for processing without overlapping the processing of your new growth and your previously relaxed hair.

Start going natural. Not back to your natural hair if that is not something that you want to do but back to natural products. This might prove to be the best thing that you ever do for your hair. Petroleum, mineral oil and similar products do not promote hair growth. Natural products like carrot, molasses, eggs and natural oils can be better alternatives than the stuff that you get in bottles.

Dump fine tooth combs and hard brushes. Chuck them in the trash, anything that can snag your ends will do your hair little good.

Use only those products that are proven to work for you. Through trial and error many of us have come to discover certain products that we can’t do without. If they make your hair silkier and softer, why switch or experiment? Chuck the rest that are cluttering your cupboard, remember less is more.

Deep condition hair with heat every week. This used to be somewhat of a bother for me but it works. Find a good deep conditioner with protein and moisture balance and do it every week. You will see the difference after three or so weeks.

Stop shampooing your hair with commercial shampoos. Lather rinse repeat cannot be your mantra for black hair. Not all shampoos are created equal, some of them contain harmful chemicals and toxins that will strip hair and cause excess dryness. The ones that sud the most are the worst. Use regular conditioner to wash your hair instead, find a sulphate free shampoo or make your own hair products.

Relax. I am serious, do not be so stressed out, it will make your hair fall out (stress hair loss). I had a friend who used to follow every hair tip I told her but her hair would still not budge. Then she got rid of her headache-inducing man and her hair began to grow like a weed.

Hair Food. Try to eat those foods which will enhance hair growth and retention. Some of them are foods which contain protein and iron, along with a well balanced diet, you are on the right track. Do not take so-called hair supplements from just any company. If you eat right and exercise you do not need to take supplements at all.

Water. Drink plenty of water it is like tonic to your hair, it is great to moisturize
 the hair from within. Employ all of these ten steps and you will have your waist length hair. Hair grows an average of ¼ inch to ½ inch per month. It is up to you to retain this hair growth through healthy hair practices.


***Original Post by  of Black Hair 101: http://blackhair101.com ***

Sunday, May 26, 2013

1week growth pictures!


Just a quick length check! I have been using my monistat mix for a little over 1 week and I have definitely seen growth! I have also been taking Biotin pills to also promote hair growth.

I know my hair looks ratchet!! Lol but this is just a pic of my new growth. The pic to the left was taken about 5 days into the treatment. The right pic was after a week. My new growth is soo thick, you can barley see my scalp through my part! I am holding out for a relaxer because I had one not to long ago.


After a week, my hair falls below my first line, when I first began the challenge.


My left side showed alot of growth!


^^^My hair on the side now reaches the first line!


In the pics above, you can see the line where my hair fell just a week before I took them. It may be slight growth, but it's growth!


A (bad) pic of what my hair in the back looks like! I'll be sure to turn AROUND the shirt to show the lines next time lol


Thursday, May 23, 2013

Hair growth-All about protective styles!!

Hey all!! I will be doing some reviews on some wigs soon! I wear wigs because they are the ULTIMATE protective style (in my opinion) because there is no hair left out. Sew ins are protective too but sometimes the hair you leave out can become heat damaged because you may put heat in it to try and blend it with weave. Since I'm on my hair growth journey, I need styles that keeps my from over styling my real hair with heat and products, allowing it to grow!


Fab Fringe wig-color Champagne


Invisible Part wig-Festival


Deep Invisible Part Lace Wig-Americano Color 99J


Deep Invisible Part wig-Latte


These wigs (not the pictures) come from www.elevatestyles.com! They where about $24.99 each which is unbeatable. I will making video reviews on them so keep a look out!

Monday, May 20, 2013

Monistat for hair growth: 12 day results???

Ok you guys....is it just me, or am I REALLY seeing growth after just 12 days!!! Take a look at my roots! They are wavy! I just had a relaxer a few weeks ago and normally my roots would still be super flat, especially by how much I flat iron my leave out.

It's a bad picture but in real life, I can truly see and feel growth! Here's another with flash.


You can see the growth a little better in the above picture. I have been using miconazole nitrate, which is commonly found in Monistat. I have been using a concentrated version of the mix, meaning more monistat than a dilute agent. Recently though, I have mixed my MN with another cream moisturizer which has made the headaches go away (headaches are common when putting non-watered down miconazole nitrate in your scalp). I hope I will continue to see growth! My first length check is in 2 days!


Saturday, May 18, 2013

Biotin for hair and nail growth!

MN challenge update! I purchased some biotin pills today! If you don't know what biotin is, it's a vitamin that helps promote the health and growth of hair and nails. I purchased this small bottle for $2.89 at my local Walmart but they can be found in drug stores as well.


So far, I have been experiencing slight head aches, tenderness at sight of application of the monistat mix and slight shedding (but I'm not sure if its normal shedding or if the MN is causing it because it's not A LOT of shedding). I have so noticed a little wavy hair near my scalp area that wasn't there before. Could the monistat have grown my hair within just 9 days??!!! We will see at my next length check next Wednesday!


I will continue to wear protrctive styles such as buns and wearing u-part wigs and sew-ins to give my hair some rest and time to grow :)


Thursday, May 16, 2013

MN challenge: Easy length check shirt!

I made this shirt to keep track of my hair growth during my 60 day monistat challenge. I just took an old shirt, turned it inside out, and used a ruler to mark the inches, then took a black permanent market and made the lines going across! Each line is an inch apart.


The marks above and in between the lines are where the hair currently is. 


Wednesday, May 15, 2013

Day 1 of 60 day MN challenge


Just a few pics and my journal entry for the day! Yesterday was Day 1 if my 60 day challenge. I will be on this challenge for 60 days. I will apply this mix to my scalp for 7 days straight, then apply every other day.

I bought this from Walgreens for about $11.

Monistat 7 2%

African Hair and Body oil

This is the oil I used to mix with the MN. There isn't any particular measurements I used.

Monistat Mixture

The mix is super chunky! It's kinda hard getting the thick mix through the nozzle.


I experienced a slight tingling sensation on my nape area but it went away by morning. We will see is this works! I will post hair comparison pics in one week!

Making my MN mix for hair growth! (Miconazole nitrate)


Tuesday, May 14, 2013

Hair update-My 60 day MN challenge!

Hey bloggers! Just a quick hair update. I will be starting my MN challenge today! I will go in this particular challenge for 60 days.I will be using miconazole nitrate (commonly found in monistat and athletes foot medicine) to help grow my hair. CRAZY?! It sounds like it! Does it work?? Yes! According to many many YouTube vids, it has been affective in growing African American hair, whether relaxed or natural!

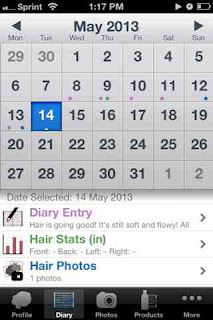
Hair Journal app on my Iphone to help me keep track


May 14th, day one!!!!

Day 1 of my 60 day MN challenge

Here is a photo of a women that went on a MN hair challenge and got good results

MN challege results (not my results!)

Here is my current hair length (BAD PICURE). I have been relaxed since I was 12. I transitioned/stretched for one year from 2010 to 2011. I relaxed again in 2011.

My current lenght when in ponytail

WHAT WILL IT DO??: MN is basically an anti-fungal medication. It helps kill fungus and bacteria (that may be left by relaxers!!) that maybe preventing your hair from growing! 

ANY RISKS/SYMPTOMS?: There have been reports of headaches, hair loss/shedding when stopping the treatment and dry itchy scalp. 

HOW WILL YOU USE IT?: I will dilute the MN with hair oil. I'll shake the entire tube of MN in a bottle with hair oil. I will use more MN than oil. I will distribute it on my scalp and problem areas, such as the nape and edges, every other day for 60 days.

WILL IT WORK FOR ME?: It's not a guarantee! Do your own research and determine for yourself! 


My first Egg & Mayo Protein treatment!

I have started my protein regimen! My hair was super dry....especially my ends. I started doing some research.I then learned that hair needs protein to strengthen it. I had heard about putting eggs in your hair but thought it sounded crazy but it truly works!!


Hair Journal App


What I did was mixed 2 eggs and mayonnaise together with a fork. I used a perm brush to get the mixture close to my roots. I used my hands to put the rest in, mainly focusing on my ends. I then out a shower cap on and let it sit on for 30 mins.


Egg & Mayo Mixture, wide tooth comb, shower cap, perm brush!


This stuff works wonders when blow drying and flat ironing!
Optimum care Heat protectant by Soft Sheen Carson
 

Above is The heat protectant I used while blow drying and before flat ironing.


Hair Cholestoral!
 

I used the above product along with my egg mixture. Helps restore moisture and shine!


Vitika Hair oil


I sometimes use vitika hair oil to nourish my scalp. I use hot water to warm it up, apply it to my scalp, let it sit then wash it out. I did not use it this particular time.


I really noticed a difference in my hair!!!

Started my long, healthy hair journey!

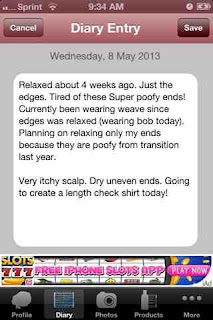
Ok guys I'm tired of my hair hovering around the same length! For years my hair has been the same length!! I'm going on a journey to mid back length hair by my birthday next year! I will be using MN to help my accomplish my mission! If you don't know what MN is, google "MN for hair growth"!! I downloaded this app called "hair journal" to help me keep track.


This is my entry for today. I measured my hair.

Hair Journal entry
MY HAIR LENGTHS AS OF MAY 9th!

Front bangs: 7 inches
Back nape: 7 inches
Left side: 12 inches
Right side: 12 inches
Hair lengths on May 9th


It says cm but it's inches lol

I will be posting more pics and info of my journey periodically! Check out my YouTube page for vids!